Building a Steel Workshop

For the Handyperson, a Useful Steel Workshop Building
All men, and probably most women too, need their sheds, or at least that extra bit of space to carry out and enjoy their hobbies and crafts. Most of us never have enough room to spread out in the house or office as we'd like to, so there's a good reason for building a shed or workshop.
The beauty about having your own space in the backyard is that you can leave it in a state of chaos, if that's what you want, without offending the rest of the family. I have several hobbies and never have enough room to get really stuck into them properly, one of these being photography where the printing of large sized photographs and making frames for them requires plenty of space and specialized tools. If I don't get finished by the end of the day it doesn't matter as I know I won't be in anyone's way.
I decide to opt for a vinyl/steel workshop, as in our damp climate they are more durable and will last longer, they can also be effectively insulated inside.
Here's my story of how I built my steel workshop with the help of a few others.
Created on 9 May 2013
All photos © Rob Hemphill
What Type of Shed to Build
Plan carefully
When I began planning for my workshop several things came into mind:
1. What was my budget going to be?
2. What size of building do I comfortably need?
3. What height should it be?
4. What material should it be made out of?
5. Should it be a self build or pre-fabricated?
6. Do I need planning permission? Can depend on size.
Then a few other things need to be given consideration:
1. Location.
2. Accessibility for construction.
3. Can I get electricity and water to it easily?
4. Are we safe from underground cables when digging the foundations?
5. Is there room all around the building to avoid congested or cluttered areas from developing, especially if you're keen on car or other motor maintenance?
6. Do I need a concrete pad nearby which can be useful when working on machinery and equipment?
Good Plans & Planning Saves Money
Using accurate plans are vital
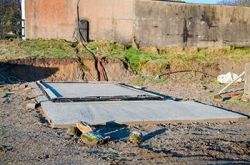
The location for my building in the yard was on sand which meant that we had to have slightly deeper foundations than usual. After digging the foundations and setting up the shuttering, a concrete lorry arrived with a mix sufficient enough for the entire pour in one go. This is beneficial as there would be no joining of separate mixes with different drying times which could allow for cracks.
Having left the concrete in the foundations to set for two days, we dismantled the shuttering, and started to prepare for the base floor. I had been supplied with the building plans including all dimensions, so all we had to do was make exact measurements. Again, we set up the perimeter shuttering and leveled the base taking into account the 4 inch floor depth of concrete required. A ducting pipe had to be built in to the concrete under the floor to enable the electrical wiring to be threaded through at a later date.
Tools for Building Your Workshop


I Chose a Pre-fabricated Building
Quick and easy
Having looked around at many steel, vinyl and wood buildings, I found a steel one which came with good insulation in the pre-fabricated wall and roof sections. We get very cold winters, so I need to be able to work when the weather is nasty.
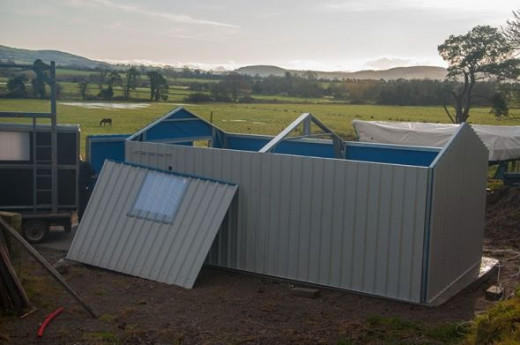
The best thing about this type of building is that once you have the concrete base down, your building will arrive and be erected in only a day or so. I found that once the building was up and secured with its roller shutter door at one end and side access door, it took several weeks to become fully dry. This is because the moisture from the concrete is trapped inside your new building, so it's a good idea to open doors during the day to air the space to speed the drying time.
Once all was completely dry inside, I set about fitting 8 ft x 4 ft sheets of MDF (multi-density fiberboard) to the walls, this will be my backing board to attach pegs and shelves to hold my tools and other bits and pieces.
Handy Craftsperson?
Are you a handy craftsperson or not?
Concrete Foundations & Floor - Must make sure it's all level.
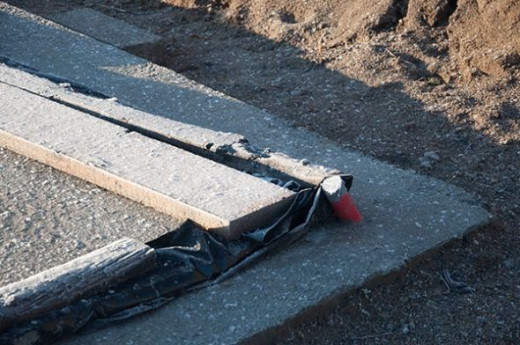
The foundations and floor have now set, and you can see the red ducting pipe that has been left in for the electricity cable to be passed through when the time comes. Always think ahead for any service ducting that's required and put it in place before the concrete is poured, as you don't want to be chiseling out a channel in the hardened concrete later. It's easier fill in an used channel.
The black plastic sheeting is the damp proof course that has been put underneath the concrete floor. It's important to have this in place to prevent moisture from rising up and causing dampness to the floor and walls.
When I laid this sheet out prior to pouring the concrete, my cat decide to investigate and walked right across it leaving tiny puncture marks where her claws has penetrated through. Luckily, I haven't had a problem with rising moisture yet!
Arrived on a Small Lorry
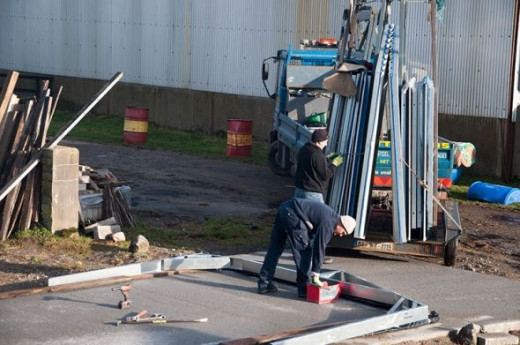
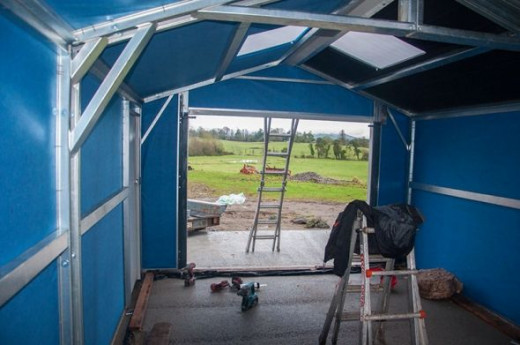
The first thing we had to do was assemble the framework which was so easy and straight forward. All connections were done using either screw bolts directly screwing into the iron struts or nuts and bolts securing larger pieces. Once we got the main frame up it was just a matter of attaching the horizontal connecting pieces, and then the individual wall sections.
When I was satisfied with the structure's position and that it was perfectly square, it was bolted down onto the floor ready for the roof sections.
Erecting the Walls
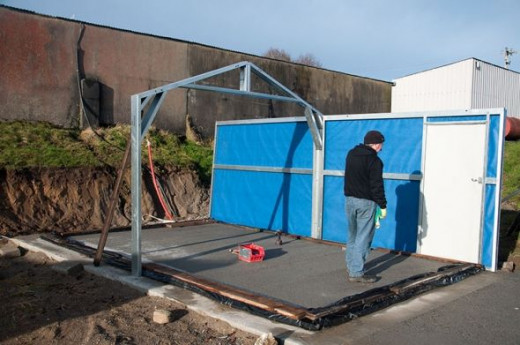
Knowing exactly where you want your doors seems obvious, but you'll be surprised how often a pre-fabricated unit is delivered onto a site only for the customer to say that he thought the door was the other side or end. No changes can be made to these sections once they leave the factory, so if you've got your plans, read and interpret them properly, then you'll have no trouble.
Attention to detail pays dividends - don't cut corners.
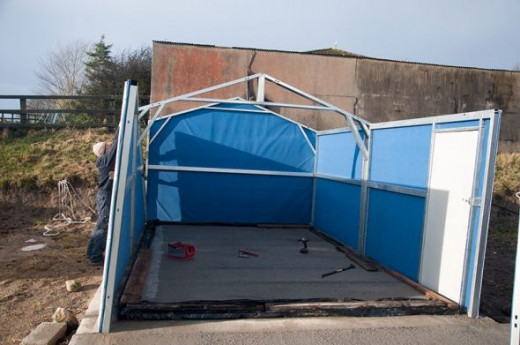
Walls Up, Next the Roof
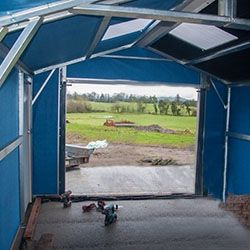
The blue heavy duty fabric on the walls protects the insulation underneath. It's breathable so should any moisture accumulate for any reason, it will not be absorbed into the insulation but merely run off the surface. This is very good in high humidity or very damp conditions.
A roller shutter door will be fitted to the front section after the roof has been applied.
Finding the Right Shed


Ready for the Roof
A roof panel awaits its turn to be lifted into place, and soon we'll have something that resembles a building, and hopefully keeps the water out!

Fitting the Roof
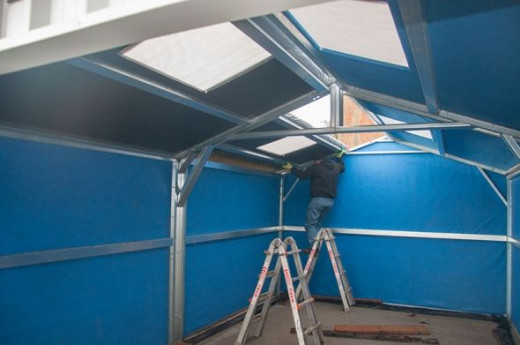
Having skylights in the roof is important for any workshop area as natural light is always better than artificial light. Strip lighting will be installed to ensure bright light above the work benches and other important areas.
Once the building is up, and I have a shell on my hands, this is the time for secondary planning. Where will the bench be, how long and how high and so on...
There's a good reason not to rush the installation of all your equipment too soon as you may find that once bolted down they may be in an impractical place in relation to other items.
Safety first
If you are installing the electrics yourself, get your installation checked out by a qualified electrician afterwards.
Only the Roller Shutter Door Left!
I can now see the amount of space I'm going to enjoy, and already know where my workbench is to be sited.
I always like to have loads of room on a bench, so as you'll see in a minute, my bench is going to run three quarters the length of the building. I need to have room for two vices, one a woodworking one, the other for heavy duty stuff and a bench grinder. Other equipment I have will be positioned accordingly when I work out where it should go.
Equipment

Workshop or Shed?
Do You Have a Workshop or Shed?
New Workbench - Waiting for tools!
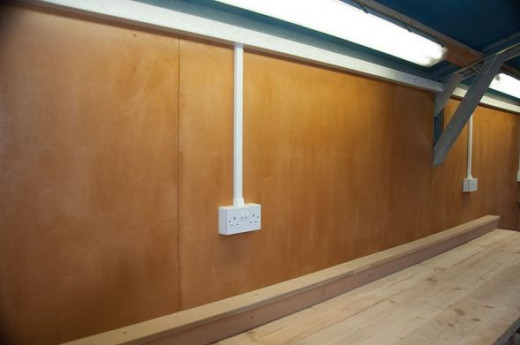
Now my building is finished, I'm ready to start fitting out the interior. The long workbench is also complete, however I'm unable to use pegboard to hang my small tools onto so as you can see I've lined the entire inside with MDF and varnished it.
The next task is to set out the positions of where I want everything to go, then drill and insert wood dowels which will be glued into place.
I expect this will be the only time my workshop will be tidy!
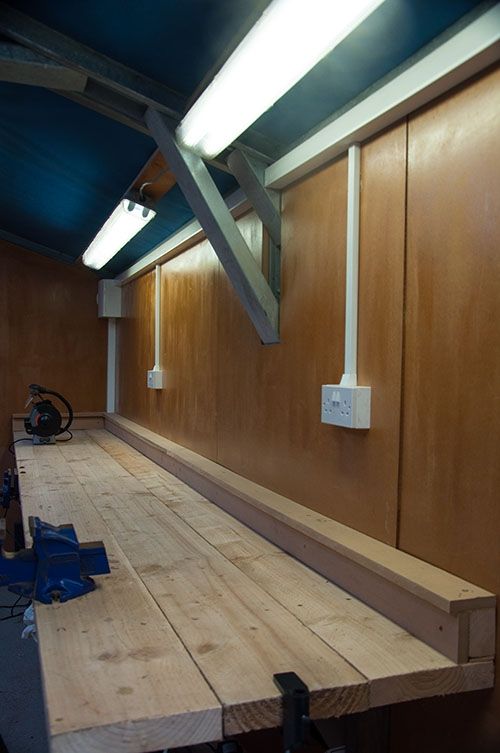
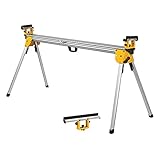
This bench was built using my ever trusty set of Bosch tools which you see below. My miter saw is an amazing DeWalt, so between these two makes you'll have the best tools available.
With the right tools in a workshop, any sort of crafting tasks or woodworking is a joy to undertake.
Time to go and build something else!