How to Photograph Birds in Flight

Birds in Flight and How To Photograph Them
It's a great sign when the swallows and house martins arrive from their winter in South Africa. With longer days ahead and a bit of warmth, it's not only the birds who are coming out of hibernation, we've also been shedding off layers of clothing and enjoying the onset of summer.
The birds are coming here for a good reason, food, and lots of it, enabling them to rear their young effectively. I'll be wandering into the fields with my camera and watching this plethora of activity with interest. I want to try and capture their swirling flight movement on digital film, but with this species of bird it's easier said than done.
I know there are many slower and easier birds to shoot while flying, but what I'm trying to do is to learn more about my camera for this type of photography. Getting the right lens and other equipment to hand, and along with so many different settings on a digital SLR camera, it takes time and practice to learn, and be able to change them accordingly to suit the situation.
Practice time for shooting birds in flight has arrived, let's see what we can bag - not literally of course, just digitally!
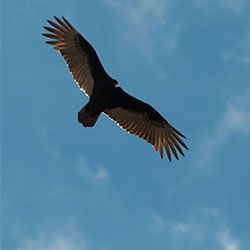
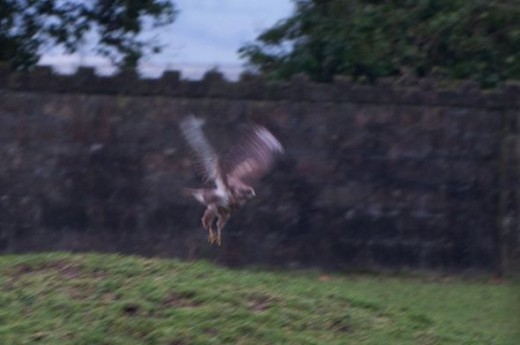
Photo: Buzzard Watching & Waiting
Created on 1 May 2013
All photos © Rob Hemphill
Swallows & House Martins
It's a wonderful sight to see the return of the swallows and martins knowing that they've made this extraordinary long distance flight from their wintering grounds in South Africa.
The swallows feed together in small flocks while In their wintering areas. These flocks subsequently join together to make up larger roosting flocks of thousands of birds, as they prepare for the long flight back to the UK and Ireland for the summer. They arrive around and about April and May time.
Migrating swallows can cover a distance of 200 miles per day at speeds of between 17 and 22 miles per hour with a maximum speed 35 mph. They fly mainly during the daylight hours at lower altitudes so they can find food on the way. The journey is hazardous, and a large number of birds die from exhaustion and starvation, as well as in storms.
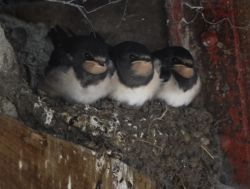
When they arrive, they waste no time and start building their nests immediately, the activity all around is frenetic.
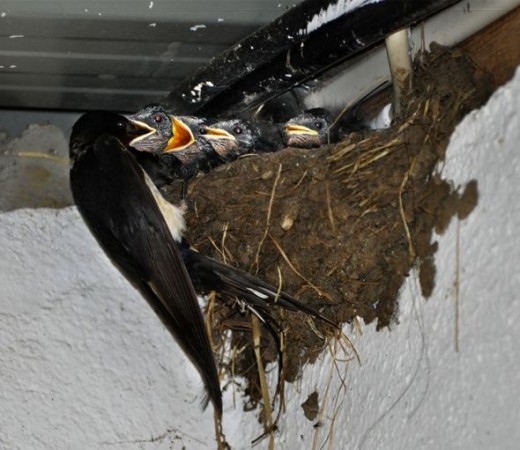
Photo: House Martin Chicks
Learn About Bird Photography


House Martin
House Martin Approaching
Photo: © 2013 Rob Hemphill
Settings: f5.6, 1/4000, ISO 200
Even when zoomed in below, the bird is still in reasonable focus. It was too far away for its eyes to be noticeable, but I found it hard enough focusing on the bird let alone fine tuning on the eyes. A slower bird is what I need to practice on!
Shooting Birds - With a camera
House Martins Feeding
Photo: © 2010 Rob Hemphill
This was the very first photo I took when I bought my Nikon D90 DSLR camera. I perched (no pun intended) on a wobbly ladder and waited for the parent to return to the nest.
With a telephoto zoom - Nikon 70-300mm lens - I was able to get in close and wait for the moment. My love of photography had begun, but I hadn't realized how difficult bird photography really was, because they never stay still for a moment. It's vital to get the bird's eyes in focus, or the at least nearest eye if the bird is sideways on to you, I didn't know about that when I took this!
Telephoto Zoom Lenses - The right lens for photographing birds in flight.


How To Photograph Birds in Flight
Equipment Requirement
Learning how to photograph birds in flight is another challenge altogether, which I'm still very much a beginner at. It's a bit like rubbing your tummy and patting your head at the same time as there are so many camera settings to take into account before you take the shot.
Photographing flying birds can be a real challenge for most cameras and lenses. But this is where digital DSLR cameras really come into their own for many reasons as they have to:
1. Be able to focus on fast moving targets and then remain locked on to them for long enough to capture an image, without being fooled by either distracting or contrasting backgrounds.
2. Set a correct exposure automatically in ever changing scenes.
3. Operate with fast enough shutter speeds in order to freeze action (1/4000th second or even faster).
4. Be able to capture several images in quick succession (3 to 10 frames per second).
Camera Settings
With an array of settings on digital SLR cameras, getting them all right will make a huge difference to the quality of your bird photographs.
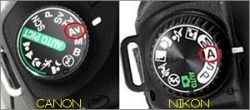
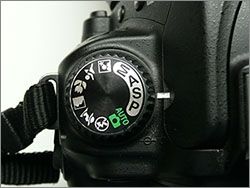
Exposure Mode
Your DSLR has a range of exposure modes which include Programme (P), Aperture-priority (A or Av), Shutter-priority (S or Tv) and Manual (M).
Aperture settings on Canon and Nikon cameras
It will probably also have a number of special pre-set modes, such as macro and landscapes, but you won't need these now.For bird photography, it's a matter of compromise between control in the field using Manual mode, which can be slower, resulting in possible missed shots and assistance from the camera's auto settings.
With birds in flight and moving fairly fast, freezing them without blur, especially when using a long lens which magnifies camera shake, requires a fast shutter speed.
Therefore, Aperture-priority is the best mode for nearly all bird photography as it allows you to fix a wider aperture and have the shutter speed in the camera set automatically.
Autofocus mode and AF point selection
Most DSLRs usually allow you select between two or three AF modes: Single Autofocus or Single-Servo Autofocus, Continuous Autofocus or Continuous-Servo Autofocus and Auto AF which switches between both. Single Autofocus stops focusing when it has locked on to the subject, whilst Continuous Autofocus continues to track the subject as long as the shutter button is pressed halfway. For flying birds, Continuous Autofocus should be used for much of the time.
Apart from using the central AF point, DSLRs normally allow you choose one of either four, eight or more additional AF points evenly distributed around the viewfinder. In bird photography, the choice of AF point will depend on your composition, as almost all of the time you want to be focusing on the bird's eye. All you'll have to do is move the focus selector to its ideal point.
Shutter Speed
As you'll probably be using Aperture-priority mode, the shutter speed in this case will be automatically set by the camera. But beware, when hand holding long lenses there are limit on the shutter speeds you can use.
N.B. Good rule to remember - you can hand-hold a lens at a shutter speed that's the inverse of the focal length:
==>> 300mm lens requires a shutter speed of at least 1/300 second.
Light levels may not allow for fast shutter speeds, here are a few things you can to do to get around this situation:
1. Always try to use a support of any kind, like a tripod, monopod or even a beanbag, and most importantly use a remote shutter release to reduce camera shake.
2. Perhaps you can't use any method of support in the field, so you'll need to learn how to pan your shots while hand holding. This takes practice, and combined with shooting in continuous mode your success rate will improve over time.
3. By using image stabilization (IS) or Vibration Reduction (VR) lenses, you will be to use shutter speeds two or three stops slower than those without any form of stabilization, so you can use 1/125 or even 1/60 sec instead of the faster 1/500 sec.
4. With DSLR cameras there is a welcome additional option, which is that you can set a higher ISO setting to allow faster shutter speeds to be used.
Flight: The Genius of Birds

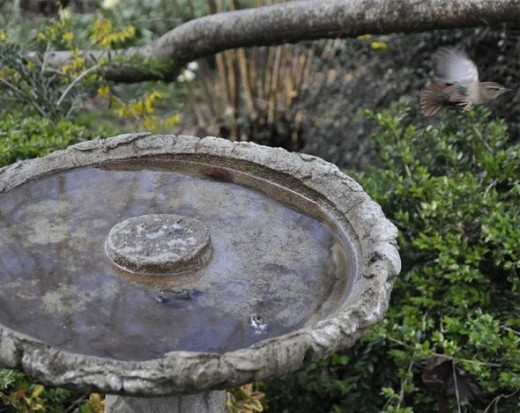
Blue Tit Bathing
Blue Tit in a Birdbath - 28 photos
Photos: © 2013 Rob Hemphill
Rather than showing you a series of individual photos, I thought I might animate a selection to show you how you can capture birds from a nearby location without disturbing them.
This sequence of 28 images was taken remotely using just a couple of amazing Pocket Wizards as my automatic triggering devices.
This was the first time I had ever used these remote units, and I can honestly say that I'm completely hooked on them. They enabled me to get close to the action without frightening the birds away. Actually, I found that as each shot was triggered, the birds would hear the shutter click and tilt their heads wondering what the noise was, which often made for interesting shots.
Setting the camera's shooting speed to its maximum fps (frame rate per second), which on my Nikon D90 is 4.5 fps will increase your chance of success as you can fire in bursts if necessary. I still have a lot to learn about this method of taking photographs, but it adds another dimension to the sorts of shots that can be attempted.
How the shots were setup
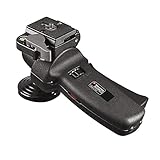
1. I positioned my Manfrotto Tripod with Manfrotto Joystick Head attachment about 7 yards from the birdbath, set quite high, so the camera points down into the water to see clear action.
2. Next I located the camera onto the tripod. A Nikon 18-105mm wide angled lens was used with a pocket wizard attached to the camera's hot shoe and a remote triggering cable synced to the camera.
3. Line up the shot by pre-focusing on the near side of the birdbath.
4. The camera settings I used were: f5.3, 1/200, ISO 200. This meant that there would be a fairly shallow depth of field rendering the foliage in the background blurred. I could have set a faster shutter speed, like 1/1000 sec to freeze much of the movement, but I felt it would look more natural to have a small amount of blur in the wings.
5. Switch on the Pocket Wizard on the camera and also the remote one I would have in my hand.
6. From now on each time I press the button I get a photo. So I positioned myself inside the house behind a large window and watched.... and pressed.... and so on!
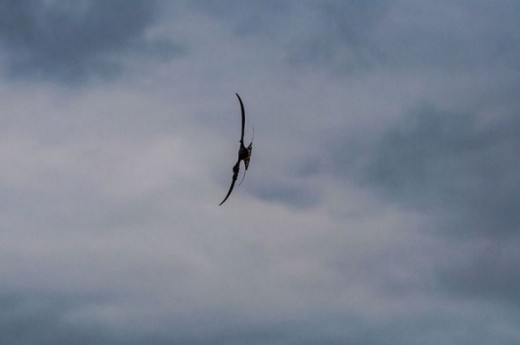
Wren Making a Sharp Exit!
Wren With a Purpose
Photo: © 2013 Rob Hemphill
I was a bit too slow catching this wren, but nevertheless I did get his tail end!
The settings for this shot were set on SHUTTER PRIORITY at f4.8, 1/800, ISO 2000, EV+4 (EV= Exposure Compensation). As the shutter speed was fast, less light was able to enter the camera so the image would be far too under exposed, and so that's the reason for adding exposure compensation.
Next time, maybe I should open up the lens to a wider angle so I'd have more chance of catching the subject in time - or perhaps I should respond quicker!
Favorite Photography Subject
What is Your Favorite Photography Subject Matter?
Manfrotto Tripod

Manfrotto Joystick Head
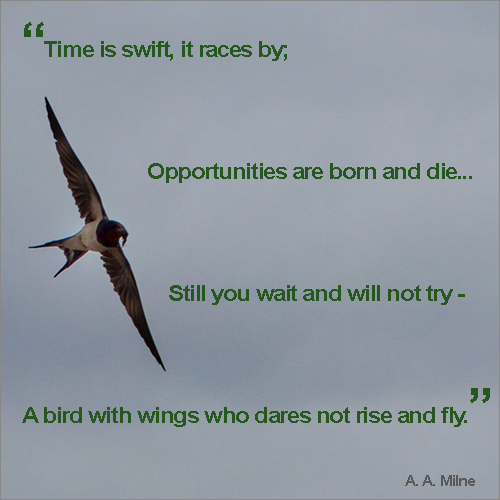
No bird soars too high, if he soars with his own wings.
by William Blake
Source: AllGreatQuotes
Birds in Blur
Shutter speed = too slow
When I started out trying to capture birds in flight, I hadn't really grasped the notion of how important the MANUAL MODE setting on the camera really is. As a beginner, it's much easier to leave the setting on AUTO MODE, and so allowing the camera to choose the aperture, shutter speed and ISO itself. When in auto, one presumes that everything will always be in focus, and the image will turn out great every time, well it does pretty well most of the time - but what it doesn't allow you is to be CREATIVE.
By creative, I mean you may intentionally want to have a very slow shutter speed to cause a blurred effect or the complete opposite, a fast shutter speed to freeze the action. It's the latter we want when capturing birds in flight, although if the speed is too fast, like say 1/4000 of a second we'll freeze the action so much that it may not look natural. A bit of blur toward the wing tips gives the sense of movement, so that's why a good shutter speed for bird flight is around 1/1000 or a little faster.
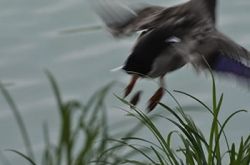
Duck image camera settings: f11, 1/125, ISO 200
Sparrowhawk - Don't shoot in Auto mode
This was an early effort at trying to capture a bird in flight. Apart from not locking on the bird with the focus fast enough, the settings were not too bad. However, the shutter speed at 1/60 sec was too slow to freeze the movement resulting in blurred wings.
This is an example of why one shouldn't get stuck on shooting in Auto mode. The camera didn't know that I wanted a fast shutter speed and gave me a safe exposure (f5.6, 1/60, ISO 1600) instead. Another thing I failed to do was to half-press the shutter button in order to activate the focus prior to taking the shot - I think I just pressed it all in one go - typical beginner!
Heron - Poor shot altogether
Heron
Photo: Rob Hemphill
f11, 1/320, ISO 200
Here's a good example of a badly taken BIF (bird in flight). My composition was poor, the shot was rushed and nothing worked out.
What I learned from this experience was:
1. Don't zoom in too tightly.
2. Allow space for the bird to fly into.
3. Compose the shot properly.
4. Make sure all the settings are correctly set beforehand - it's too late after wards!
5. Select Single Point focusing or maybe Dynamic Area.
6. Track the bird accurately to lock on focus.
7. Take the shot.
The Mastery of Flight
Bird Flight at Speed
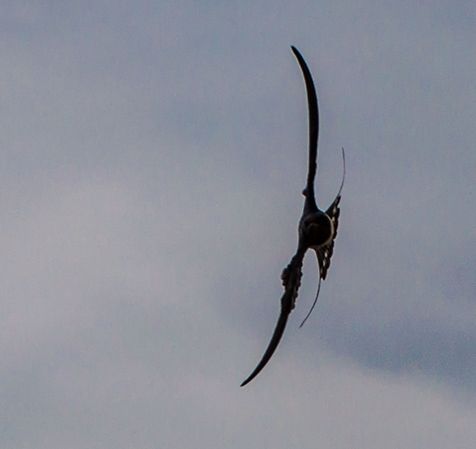
Buzzard
Buzzard Swooping
Photo: © 2012 Rob Hemphill
f7.1, 1/800, ISO 200
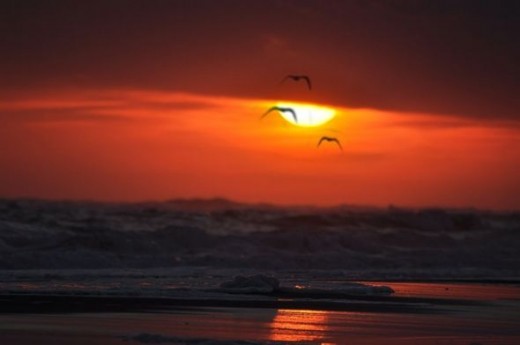
Seagull Feeding
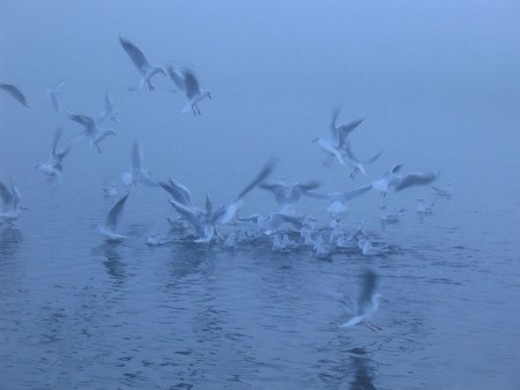
Seagull Feeding Frenzy
Photo: Rob Hemphill
f4.8, 1/125, ISO 50
I took this photo on a foggy summers evening on a large lake on the River Shannon in Ireland. The camera I had then was just a simple point-and-shoot, hence the increased blur. But this is where I think that the photo may not have been as moody if the birds were all in sharp focus - so this is where creativity in photography comes in.
Beauty is in the eye of the beholder
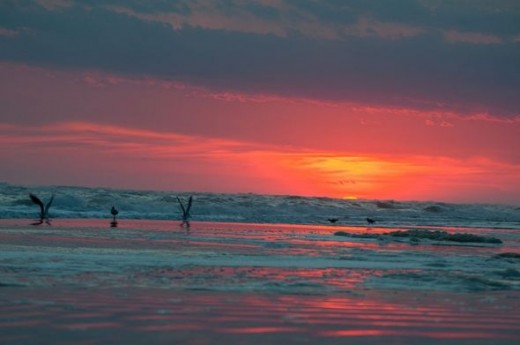
Seabirds on Atlantic Beach, North Carolina
Photo: © 2012 Rob Hemphill
f5.6, 1/100, ISO 200
Atlantic Beach